
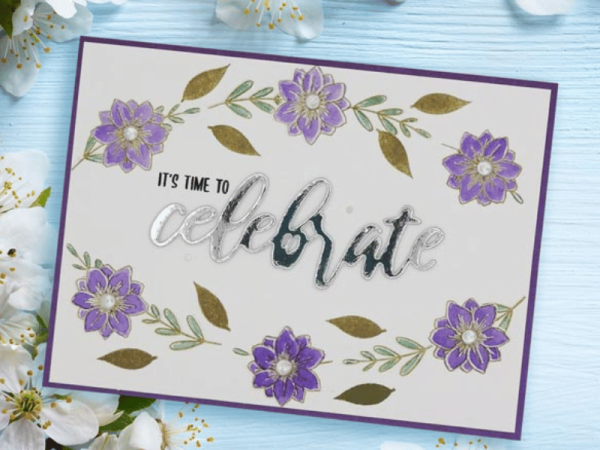
A beginner's guide to cardmaking
As something of an introduction to the bold, new world of crafting, I was invited to attend a cardmaking workshop last week with my partner-in-craft, Jenny. It was time to jump in the deep end and as a fresh-faced newbie, discover the exciting world of cardmaking!
Slightly apprehensive having seen the end product and realising the mammoth task ahead of us, we nonetheless rolled up our sleeves and got cracking. Matting and layering, die cutting, embossing, poking, gluing, glittering, stressing, laughing - have I forgotten something? We did it all!
If we can make it, so can you!
From our session today, here are my top 10 tips and item must-haves for the beginner crafter to consider:

- Be patient. Crafting the perfect card takes a great deal of time and patience! Admittedly, we missed out a step, but in all it was 3½ hours of love dedicated to our cards. I'm sure you'll agree it was worth it!
- Using an XCut guillotine (pic. 1) is immense fun and gives a really clean cut. But measure correctly - chopping off fractions of millimetres can get messy!
- Shaping flowers is much easier using a foam pad and an embossing pen.
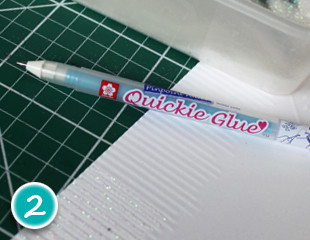
- Invest in a glue pen (pic. 2). I never knew they existed, and now I must buy one. Knowing I will use it for everything, I wonder how I survived without it.
- Use plenty of masking tape to keep your dies in place. You'll thank yourself later after running it through your die-cutting machine 3 times to get the perfect cut, and preventing it from slipping and completely destroying your die cut!
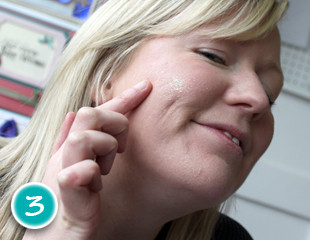
- Embossing glitter (pic. 3) also gives your face a lovely shimmer. Also looks fabulous on paper.
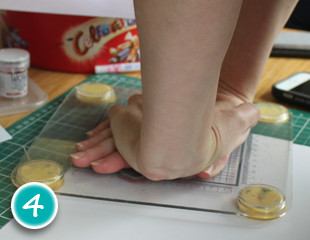
- When you're asked to press really hard on a stamp block (pic. 4) - press really hard! Partial prints don't look great unless intended.
- Silicone glue is an absolute must-have. Super strong and without the faff of a glue gun, it secured our die-cut flowers in no time.
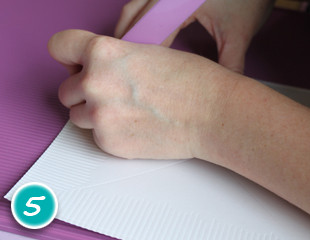
- Unless you want to tone up your arms, hand-embossing lots of detail on a scoring board is tough going (pic. 5). Get yourself an embossing folder instead.
- And, finally - listen to the experts. They've been there and done that. Sticking 6 different branded dies through your cutter at once as a time-saver will surely end in disaster!
The final word
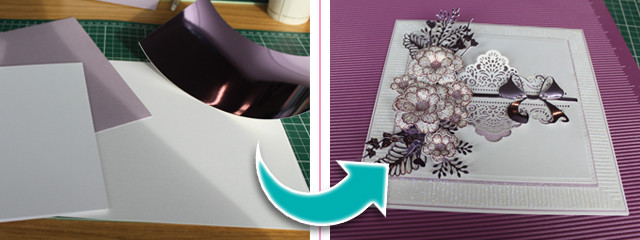
Like Alice down the rabbit hole, I've well and truly landed with a thump in an exciting new world. Here the adventure begins, and I'll shortly be picking up a die cutting machine to help me along my journey. Without dies, the intricate shapes would have been near-impossible to re-create. And with them? The crafting potential has turned exponential.
For more invaluable hints and tips, pick up your copy of Die-Cutting Essentials today!

Louise - Online Editor
As something of an introduction to the bold, new world of crafting, I was invited to attend a cardmaking workshop last week with my partner-in-craft, Jenny. It was time to jump in the deep end and as a fresh-faced newbie, discover the exciting world of cardmaking!
Slightly apprehensive having seen the end product and realising the mammoth task ahead of us, we nonetheless rolled up our sleeves and got cracking. Matting and layering, die cutting, embossing, poking, gluing, glittering, stressing, laughing - have I forgotten something? We did it all!
If we can make it, so can you!
From our session today, here are my top 10 tips and item must-haves for the beginner crafter to consider:
- Be patient. Crafting the perfect card takes a great deal of time and patience! Admittedly, we missed out a step, but in all it was 3½ hours of love dedicated to our cards. I'm sure you'll agree it was worth it!
- Using an XCut guillotine (pic. 1) is immense fun and gives a really clean cut. But measure correctly - chopping off fractions of millimetres can get messy!
- Shaping flowers is much easier using a foam pad and an embossing pen.
- Invest in a glue pen (pic. 2). I never knew they existed, and now I must buy one. Knowing I will use it for everything, I wonder how I survived without it.
- Use plenty of masking tape to keep your dies in place. You'll thank yourself later after running it through your die-cutting machine 3 times to get the perfect cut, and preventing it from slipping and completely destroying your die cut!
- Embossing glitter (pic. 3) also gives your face a lovely shimmer. Also looks fabulous on paper.
- When you're asked to press really hard on a stamp block (pic. 4) - press really hard! Partial prints don't look great unless intended.
- Silicone glue is an absolute must-have. Super strong and without the faff of a glue gun, it secured our die-cut flowers in no time.
- Unless you want to tone up your arms, hand-embossing lots of detail on a scoring board is tough going (pic. 5). Get yourself an embossing folder instead.
- And, finally - listen to the experts. They've been there and done that. Sticking 6 different branded dies through your cutter at once as a time-saver will surely end in disaster!
The final word
Like Alice down the rabbit hole, I've well and truly landed with a thump in an exciting new world. Here the adventure begins, and I'll shortly be picking up a die cutting machine to help me along my journey. Without dies, the intricate shapes would have been near-impossible to re-create. And with them? The crafting potential has turned exponential.
For more invaluable hints and tips, pick up your copy of Die-Cutting Essentials today!
Louise - Online Editor
Recent Posts
-
-
 Categories: AllFree Download
Free Rose Design Digital Papers, Toppers and Sentiments!
Free Floral Digital Papers and Digital Stamps -
Shaun The Sheep Cardmaking - New Collection
Shaun The Sheep Cardmaking Collection -
 Categories: All
TEXT{ures} Opulence Collection & Vintage Effect Cardmaking Tutorial
New Opulence Collection and Vintage Effect Cardmaking Video -
How to use our NEW Rotating Stamps & Layering Stencils
New Collection!

